Showing posts with label margarine. Show all posts

Tuesday, March 13, 2012

Replacing Butter: Vegetable Oil

It's been a while since I've been able to post something here on the blog, but I promise I have a good reason for it. Last month, I moved from Washington, DC (my home of the last few years) to New York City as part of a new job. I was so busy trying to get everything together, I just didn't have the time to bake or blog. 

But now I've been here for a couple of weeks, and last week I kicked off the new chapter of crazy baking. I began with some hamentashen for Purim, then made a gingerbread cake for Sabbath. I was all set to spend some time on Sunday making some cookies when an idea hit me. Now would be a good a time as any to revisit a problem that had been plaguing me for many years: how to replace melted butter in a cookie recipe.

[I suppose now is a good a time as any to alert you that there's going to be a lot of science talk in this post. Hold on to your hats. Also, it's worth noting that I relied heavily on Harold McGee's "On Food And Cooking" for the science aspect of this. It's an invaluable resource.]

As I've said before in other posts, when I make cookies for Sabbath or holidays, I usually need to keep them pareve, which means they have to be dairy-free (and meat free, but who's putting meat in a cookie?). The usual solution is to grab a stick of dairy-free margarine and substitute it for the butter. I've never been a big fan of this for a couple of reasons:

1) Margarine is pretty gross. 
2) Pareve margarine isn't so easy to find (at least back in DC).
3) Margarine is not so healthy for you. 

Let me take a moment to address that last one. While doing some research ahead of this post, I discovered that, for a while, margarine was thought to be healthier than butter. Butter is high in saturated fat (not heart healthy) while margarine is high in unsaturated fat (more heart healthy, relatively speaking). But more recently, scientists discovered that the process by which oil is made solid for margarine, known as hydrogenation, turns those healthier unsaturated fats into trans fats. Trans fats are just as bad as saturated fats, and in certain ways, somewhat worse. (For more information about this, I'd recommend the American Heart Association page about fats and oils, with thanks to Leah McGrath, R.D. for pointing me towards the source. You should follow her on Twitter at @InglesDietitian)

For all those reasons, I decided to see how well I could replace butter using liquid vegetable oil as the fat, thus preserving the unsaturated fats and being a heck of a lot more convenient to boot. I don't know about you, but I've always got a bottle of vegetable or canola oil in my pantry, while my margarine is very single purpose (and did I mention gross? It smells like apples and I can't tell why!). 

Taking a page out of my creaming method experiment, I decided I would take a cookie recipe that used melted butter, make a batch, then make a second batch with my substitution of vegetable oil. Then, I would get people to try one of each cookie and tell me what they thought. I would use that information to draw some kind of conclusion, although it would never stand up to rigorous scientific scrutiny.

I chose America's Test Kitchen's Molasses Spice Cookies for this test; somewhat because I wanted my first NY post to pay tribute to my first DC post, but mostly because I like the recipe. I made the first batch without any problems then moved on to the second batch. I checked the recipe and saw that it needed 12 tablespoons of melted butter.  "Great," I can hear you saying. "Just put in 12 tablespoons of oil and be done! Right?"

Wrong! 

Interesting fact: Butter is required by law to be about 80% fat by weight. Look at any box of butter and you should see that for every 14 gram serving, only 11 grams are fat. Approximately 16-18 percent of the remaining weight is water (depending on who you ask) and the rest are milk solids and basic elements. The inclusion of water makes a difference in the final end product as well, as it leads to steam which gives some extra puffiness to the cookie during baking. Therefore, 12 tablespoons of oil was not the right way to go here.

Back when I made the first batch of cookies, I weighed the butter on my scale and got 172 grams. Using the ratio of 11 grams of fat per 14 grams of weight, I came up with about 135 grams of fat. Accounting for some rounding errors, I settled with 136 grams of oil. The water was a bit trickier. I was aiming for 32 grams of water, which would have been 18.6% by weight. Unfortunately, I over-poured a bit and ended up with 34 grams of water (19.7% by weight). I made a note to add a bit of flour later on to account for the extra liquid. 

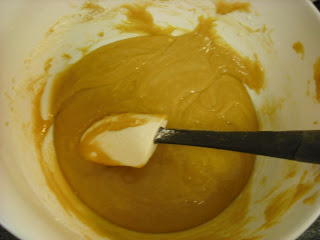
I proceeded with making the cookies without any other incidents. One thing I did note was the difference in the consistency of the cookie batter. The butter batter was much stiffer and drier, whereas the oil batter was very loose and sticky. This wasn't particularly unexpected though. Butter is a semi-solid at room temperature, with some of the solid fat turning into liquid (and back again if the temperature is right) and other fat particles remaining in the liquid state once it's reached. So with time and the right temperature conditions, the butter-based batter would tend to be a bit firmer.

When I removed the oil-based cookies, I noticed that they were a lot flatter than I expected. I couldn't figure out what had happened. I thought i had accounted for the puff by adding the water! It wasn't until a couple of hours later that I realized what the culprit might have been: the lack of acid. Milk, believe it or not, is an acid; primarily lactic acid. That acid reacts with baking soda to produce lift and puff in the cookie. Oil, on the other hand, has no pH value and is therefore neutral. I wasn't getting as much of a reaction as I wanted from my leavening agents! I'm not sure what the best way to fix that would be, but that's for another experiment.

"Enough with the science!" I can hear you shouting. "What about the TASTE?"

OK, OK! I gave four people one of each cookie and asked them to tell me which they preferred and any other comments (A fifth person was given cookies as well, but I lost track of which cookie was which so I had to invalidate her data point. Sorry, Rebecca.). Three out of four preferred the oil cookie, praising its chewiness. Everyone agreed that the texture of the oil cookie was softer than the butter cookie (one called it "mushy"). Two people said the butter cookie was sweeter, which I could understand given the presence of lactose (milk sugar) in butter. Overall, everyone thought both cookies were good and they'd eat both again.

So what's the takeaway from this experiment? I think my oil and water solution gets me about 80% of the way towards a good replication of the butter cookie. I still need to find a way to introduce a bit more acid to work with the leavening agents. I also would like to see what would happen if I used a bit of shortening to provide more structure to the fat, since shortening is a solid at room temperature. It would negate a lot of the "health benefits," but I could live with that.  Broadly, I think the takeaway is that using the oil to replace the fat proportionally by weight works very well and is worth some more exploration in the future. 

Oh, and I guess the other takeaway is: Either way, you've still got a darn good cookie to eat.

Sunday, July 3, 2011

Miracle Blondies

The story behind these blondies is not about making the blondies themselves, but what led up to their creation.

On Wednesday night, I received an e-mail from a friend asking if I and a couple other friends could put together a Sabbath meal for Saturday lunch. I quickly volunteered my apartment and said I would make a dessert and the main course. The only restriction was "no chocolate" as one of my guests couldn't eat it. That's a restriction that cancelled out a lot of my go-to desserts, but I had a plan.

I recently bought a copy of David Lebovitz's Ready for Dessert, which has a great collection of recipes. One of them is a Fresh Ginger Cake which has the benefit of being completely butter-free. I've made a ginger cake using only fresh ginger before from Joy of Cooking, but this is on a completely different level. How? Well...this one uses molasses! That's classy, right?

Anyway, I had all of the ingredients on hand except for the ginger. Friday morning, I went out to the Trader Joe's and picked some up to use later. Unfortunately, in my early morning barely-conscious haze, I neglected to check the quality of the ginger. And so it was, at 5:00 pm on Friday as I joyfully began to prepare making my ginger cake, I discovered that the ginger was moldy.

Oops.

In retrospect, the best thing to have done at this point would have been to walk down to the Safeway (about 2 minutes away), pick up some more ginger, then come back. Instead, I panicked. It's one of my great failings that I don't deal well when my plans go awry. For the next 20 minutes I rummaged through every dessert cookbook available to find a recipe I could make. Eventually, I settled on making a pie with the blackberries and blueberries I purchased in the morning. The problem here was 1) making a pie dough quickly, and 2) making it dairy-free. The obvious answer was to use shortening, but I only had a limited amount.

I turned to my favorite emergency baking resource, Ratio by Michael Ruhlman. In his book, he provides a ratio for pie dough - 3 parts flour:2 parts fat:1 part water (all by weight). Simple enough, right? I threw some shortening into the freezer to chill, then went over the recipe to see if there was anything I was missing. Suddenly, I realized that I would need to blind bake the crust, which meant I needed dried beans. I racked my brain for a moment, trying to think if there were any dried beans in the apartment, then recalled I had a bag of lentils. Somewhere. I checked the pantry. No lentils. I checked the random shopping bags in my kitchen. Still no lentils. I spent the next 15 minutes tearing up the apartment before I found the lentils...in my bedroom closet. Yeah, I don't know either.

Having recovered the lentils, I removed the shortening from the freezer and hacked at it with a paring knife. Whirling in place, I grabbed a bowl near the sink, put it on the scale and haphazardly poured out some flour. I added the shortening, then put on a pair of latex gloves and started rubbing the fat into the flour.

Next, I needed to add some ice water until the dough came together. Lacking ice cubes (yeah, don't ask) I resorted to the Brita pitcher in the fridge. I gradually poured in an ounce of water and mixed it together with my hands. It came together, but I had some doubts. By weight, I should have needed more water, but the dough in front of me didn't seem to need any. Stupidly, I added more water anyway, resulting in a dough that was way too wet. I tossed in a bit more flour and shortening, and tried to rescue it.

Then, I realized I forgot to put in the salt. Rather than do the intelligent thing of measuring it out, I opened up the container and kind of shook it at the bowl. The result was a stream of salt going into the bowl, far more than the pinch or two I needed. Resigned to the fact that the dough was no longer salvageable, I tossed it in the garbage. The time was now 5:45 pm.

At this point, I was about to say "screw it," and make brownies, a very straightforward recipe that could be assembled in a brief period of time. In fact, if you follow me on Twitter (@TalkingTV), you'd know that I even said "Screw it, I'm making brownies." But I couldn't do it. Remember, I had a guest that couldn't eat chocolate. As someone who has a very long list of food sensitivities, I couldn't knowingly make something that one person couldn't eat. Especially when that person has done a lot to cater to my problems in the past. So brownies went out the window.

Finally, I came across a recipe for blondies in a copy of Baking Illustrated that I checked out from the library last week. The only chocolate involved was chocolate chips, which I figured I'd just leave out in part of the batter. Since the original recipe called for a 9x13 pan, I decided to use two 8x8 pans. One pan would contain no chocolate chips, the other would have some stirred in. It was 6:00 pm.

I was up against the clock. I quickly shoved everything around the counter to clear some space, and grabbed some margarine from the fridge. I portioned out what I needed, threw it in a small saucepan, and set it on medium heat. It melted quickly, but started to bubble, so I lowered the heat slightly. Using the paring knife, I tried to cut the margarine into smaller pieces as it melted, with only some degree of success.

Once melted, I poured the margarine into a large bowl, then glided across the kitchen to get the brown sugar from the pantry. Yes, you read that right. I glided. Flour and sugar had accumulated on the floor during my frantic tossing and mixing, so my traction was significantly reduced. I was supposed to pack the brown sugar into measuring cups, but I was so caught up in the frenzy that I ended up just grabbing handfuls of the sugar, squeezing it tightly, then dropping it into the bowl. Thank goodness there was a weight measurement too, or it would have been the fourth disaster of the day. Quickly, I whisked the sugar and margarine together, and perched the bowl on top of some other kitchen detritus.

Next, I whisked the dry ingredients in a small bowl, taking my time to measure out the salt. I found some space on a small table in the kitchen and put the bowl down. Turning back to the sugar/margarine mixture, I tossed in two eggs and vanilla and whisked them in. Finally, I gradually added the dry ingredients to the batter and folded until just combined.

I was incredibly nervous at this point because the amount of batter was so...low. I couldn't fathom how it could normally fill a 13x9 pan, let alone my 8x8 pans. But it was too late. I finally had a dessert that was going reasonably well and I couldn't give up. I scooped half the batter into a lightly greased pan and tried to smooth it out with the spatula. (Incidentally, the recipe says to make a foil sling for the pan. I was too tired at this point to deal with it.) Then, I measured out a reasonable amount of chocolate chips for the remaining batter. OK, fine, I grabbed the nearest bag of chocolate chips and just started pouring directly into the bowl until it kind of looked right. That dough went into the second pan, and both went into the oven at 6:15.

I carefully monitored both pans, concerned that the change in volume would affect the baking time. The recipe says to remove the bars when the tops are "shiny and cracked and feels firm to the touch." After 25 minutes of baking, it didn't look like the first two conditions would be met anytime soon, so I poked the cakes a bit before deciding to remove them. I dropped them onto the cooling rack and gave them the once over.

They didn't look too bad, actually. But my confidence was so shattered after all the prior failures that I gave them a 60% chance of being edible and a subsequent 30% chance of being tasty. But I frankly didn't care anymore. They were done, they were decent, and I could move on with other things I needed to do.

By the way, I did realize later why the volume of dough seemed less than expected. I had left out the cup of chocolate chips and cup of pecans which would have significantly increased the total volume. But I don't like pecans in my desserts (except for pie) and the chocolate chips were added later in the process. It was a relief to figure out that I wasn't crazy. Or, at least, not that crazy.

The moment of truth came the next day at the meal when I served the blondies to three friends and two guests that came at the last minute. I cut out pieces from both pans and handed them to my guests. I anxiously studied their faces as they bit into the blondies, chewed, and swallowed. I held my breath as I waited for someone to render the first judgment. Finally, it came.

Tasty!

What?!?! I had managed to pull it off?!?! I grabbed a piece of the blondies for myself and tried them. They were, in fact, very good. A little denser than I usually like, but considering everything that led up to them, I wasn't complaining. My friends stuck around for a few more hours and together we kept taking more of the blondies. By the end of the day, both pans were almost completely empty.

Because the end result came out so well despite so many setbacks, I've decided to call these blondies "Miracle Blondies." It may not be a miracle of biblical proportions to have a piece of cake come out well, but when my friends didn't spit it out and instead reached for seconds, I certainly whispered thanks to God for having my back.

Maybe He likes blondies too.
-----------------------------------------------------------------------------
"Miracle Blondies" (Adapted from Baking Illustrated)

INGREDIENTS
  • 1 1/2 cups (7.5 oz) unbleached all-purpose flour
  • 1 teaspoon baking powder
  • 1/2 teaspoon salt
  • 12 tablespoons (1 1/2 sticks) unsalted butter (or margarine), melted and cooled
  • 1 1/2 cups (10.5 oz) light brown sugar
  • 2 large eggs
  • 1 1/2 teaspoons vanilla extract
  • 1/2 cup semisweet chocolate chips
  • 1/2 cup white chocolate chips (I don't like white chocolate, so I just used more semisweet chocolate chips)
  • 1 cup pecans, toasted and chopped coarse (optional)
INSTRUCTIONS

1) Adjust an oven rack to middle position and heat the oven to 350 degrees. Spray a 13x9 inch pan with nonstick cooking spray. Make a foil sling by placing two sheets of foil or parchment paper in the pan perpendicular to each other and greasing both sheets. (I find the sling optional, but that's up to you.)

2) Whisk flour, baking powder, and salt in a medium bowl. Set aside.

3) Whisk melted butter/margarine and brown sugar together in a medium bowl until combined. Add eggs and vanilla and mix well.

4) Using a rubber spatula, fold the dry ingredients into the wet ingredients until just combined. Do not overmix.

5) Fold in the chocolate chips and nuts and turn the batter into the prepared pan. Smooth the top with a rubber spatula.

6) Bake until the top is shiny and cracked and firm to the touch (the latter is the most important one), 22 to 25 minutes. Cool completely on a wire rack, then (if using a foil sling), remove the bars from the pan and transfer to a cutting board.

7) Cut into 1 1/2 x 2 inch bars and serve.

Sunday, June 19, 2011

Fudgy Oat Bars

First, my apologies for my relative absence from the blog. It's an unfortunate reality that things like my day job and other obligations sometimes prevent me from spending time in my kitchen causing disasters all over the place. Thankfully, last Friday I had the opportunity to spend some time making one of my favorite desserts: Fudgy Oat Bars.

This is a recipe that has been in my family for quite a while, which usually means that it was in a kosher cookbook somewhere and my mom wrote it down for future reference. I remember eating these when I was growing up and it's one of my favorite desserts. I suspect that my mom made these in an attempt to get me to eat more oatmeal, since I'll eat most things that are covered with chocolate. And yes, I know how that sounds. When I moved to Washington, DC after college this was one of the first desserts I made in my tiny apartment kitchen.

Unlike the previous posts on this blog, I've made this recipe enough times that there were very few mistakes or hilarious moments while I made these last week. The only "bad idea" moment was when I tried to get dough off the paddle attachment of my mixer by raising the head of the mixer while it was running. I've seen this done before without ill effects, but somehow I managed to turn the mixer on too high as I lifted the head up. As the paddle rose out of the bowl, time slowed to a crawl and I could clearly see a couple of pieces of dough being flung from the paddle at high speed and travel across half my kitchen as if in slow motion. It was a trainwreck I could see coming but was powerless to stop. Thankfully, the amount of dough I lost was minimal and easy to clean up. I also had a minor accident cracking an egg, but magically I avoided getting any eggshell into the mixing bowl.

The only significant change I made in this recipe involved what type of oats to use. The recipe just says "quick cook oats" but there'a a lot of different oats marketed as "quick cook." Traditionally, my family and I have used Quaker rolled oats, which can cook in about a minute. Early in my time in DC, I started using Irish rolled oats, which advertise a cooking time of three minutes and have a slightly different flavor and texture. For this time around, I decided to take a crack at steel cut oats. I've read in many places that they have a completely different flavor and texture, so I thought it would be an interesting variation. They're also billed as "quick cook," but with an eight minute time, it's much longer than the others. Still, why not try them out and see what happens?

The answer is that they're not a great fit for this application. Steel cut oats are very coarse and the longer raw cooking time meant the bottom oat layer was much crunchier than I wanted it to be. They were also more difficult to incorporate evenly as they had a tendency to collect in the bottom of the bowl where they never came into contact with the dough. I frequently had to scrape down the bowl with a spatula and manually mix things around a bit until they were sticking to the dough. In the future I'd stick with rolled oats, which cook faster and have a more pleasing texture in this dessert. But if all you have is steel cut oats, you'll get a perfectly fine dessert as well.

With all of that oat of the way (see, a pun!) I strongly recommend you make these bars. Be warned that the chocolate layer can be very rich, so you might want to scale back on the chocolate chips/apple juice mixture if it's too much. I've never tried adjusting it, but I'm sure that it could work. But if you're looking for a dessert that combines a toasted oat topping with a rich fudge layer, this is the dessert to make.
-----------------------------------------------------------------------
Fudgy Oat Bars (adapted from the Spice and Spirit Cookbook)

Oatmeal mixture
  • 2 cups brown sugar
  • 1 cup margarine softened
  • 2 eggs
  • 1 tsp vanilla
  • 2 ½ cups flour
  • 1 tsp baking soda
  • 3 cups quick cooking oats
Topping
  • 12 ounces semisweet chocolate chips
  • ¾ cup apple juice
  • 1 tsp vanilla

1) Preheat oven to 350 and grease a 9x12 pan.

2) Mix brown sugar, margarine, eggs, and vanilla, in a large mixer bowl. Stir in flour, baking soda, and oats.

3) Reserve 1/3 of the oatmeal mixture and press remaining mixture into pan.

4) Heat chips, and juice in a pan over low heat. Remove from heat and mix in vanilla

5) Spread chocolate mixture over oatmeal dough. With rounded teaspoonfuls spoon remaining dough over chocolate.

6) Bake until golden brown 30-40 minutes. While warm cut into 1x2 inch bars. Cool in pan.

Monday, May 23, 2011

The Creaming Method: Mixer vs. Spoon

If you've read some of my earlier posts, you'll know that I frequently lament my inability to use my electric mixer for dairy products. As a result of this limitation, I am unable to make any cookies that require the creaming method when mixing butter and sugar. I've managed to select recipes in the past that avoid this problem, such as the Chocolate Chip Cookies I made which uses melted butter instead.

But recently, I received two competing comments on posts about the creaming method. First, an anonymous commenter (later revealed to be my mother) wrote on my Girl Scout Thin Mints post: "I think it is time to get a mixer!" Then, another anonymous commenter (later revealed to be the mother of a friend of mine) wrote on my Molasses Spice Cookies post: "Wooden Spoon! One of the best implements used by bakers for generations. With a little elbow grease, it creams butter and sugar perfectly." So I had a challenge on my hands: Could a wooden spoon cream butter and sugar as well as an electric mixer? I decided to find out.

Before I began the baking, I did some research on the creaming method. This involved reading Shirley Corriher's Cookwise and watching a couple of episodes of Good Eats. Essentially, the creaming method combines fat (usually butter) and sugar together, usually at a quick speed. This has a few effects: First, it adds air to the butter/sugar mixture, resulting in a lighter final product. Second, the impact of the sugar slamming into the butter creates small pockets, which expand during baking, contributing an airy texture to the product as well. Finally, those same pockets allow other ingredients to become more evenly incorporated throughout the dough, so there aren't random pockets of concentrated ingredients.

Conventional wisdom has told me that only an electric mixer has the power and speed to cream butter and sugar effectively. Creaming by hand means that there is insufficient velocity to make the pockets in the fat that are essential to a good cookie. Therefore, the hypothesis of my experiment was this: Cookies that use an electric mixer for creaming are better than cookies creamed by hand. Now, because I was using the electric mixer for part of this experiment, I needed to use dairy-free margarine in my recipe. I found a recipe for a chocolate chip cookie that called for 1/2 cup of margarine, which was also helpful as 1/2 cup is the same as a stick, so I wouldn't need to do extra measuring.

First was the electric mixer method. To start, I pulled out a stick of margarine from the fridge and put it on a table to soften for 30 minutes. While I waited, I turned the oven on to 350 degrees. Then, I measured out my flour and baking soda. The recipe was written volumetrically, not by weight, so I wrote down the weight of everything so I could precisely duplicate the recipe when I switched to the other method. Therefore, the 1 1/8 cup of flour I used became 159 grams and the 1/2 teaspoon of baking soda became 3 grams. I didn't measure the "pinch of salt" because it was too small to measure by weight. In lieu of a sifter, I put the dry ingredients into a bowl and stirred them up with a whisk.

Once the 30 minutes were up, I put the stick of margarine into the bowl of my mixer. I poured out 1/4 cup of white sugar (45 grams) and 1/2 cup of packed brown sugar (96 grams) and put it in the bowl with the margarine. I stuck the paddle attachment on the mixer and let it run for a few minutes until the margarine/sugar mixture looked light and fluffy.

In a plastic cup, I combined the egg and the vanilla before pouring it into the mixing bowl. A minute later, I added the flour/baking soda/salt mixture in batches until everything was combined. Finally, I measured out a cup of my favorite chocolate chips (170 grams) and stirred it in. When everything came together, I started portioning the dough, where I made a mistake. The recipe calls for "heaping teaspoons" of dough, but I read it as "heaping tablespoons." Oops. But larger cookies aren't the worst thing in the world, right? As long as I was consistent, the experiment was still valid. Besides, I was weighing every dough blob to keep the cookies about the same size amongst themselves, so everything was good.

Nine 44-47 gram balls of dough later, I had my first batch of cookies in the oven. I rotated the sheet after five minutes, then checked on them again five minutes later. The centers of the cookies looked undercooked, but the edges were defined and somewhat set, so I pulled them out of the oven anyway. Once I had the parchment paper off the baking sheet and onto the cooling rack, I ran the sheet under cold water so the next batch wouldn't start cooking from the heat of the pan (as they did in the Chocolate Chip Cookies). I portioned out the remaining eight cookies, and repeated the baking process. When they were all out of the oven, I put them on the rack to cool. I separated the first half from the second to account for the slight difference in oven temperature between the two, which I expected would come up again later. You'll notice there's only 16 cookies below in the picture when I made 17. That's because I ate one. Sue me.

On the left, the first batch. On the right, the second.

Then it was time for the wooden spoon method. I repeated the starting steps from before (leaving the margarine out for 30 minutes; "sifting" together the flour, baking soda, and salt; measuring out the two types of sugar), taking care to keep the weight of everything the same from the electric mixer method. But once I was ready to cream the margarine/sugar by hand, I wasn't sure how to go about doing it. Put it all in a bowl and stir the spoon around as fast as possible? Stab the margarine with the spoon, roll it in the sugar, and stab it again?

Thankfully, The Joy Of Cooking came to my rescue. It describes a method for creaming by hand: "Mash the butter against the side of the bowl with a wooden spoon, using a rocking and sliding motion and keeping the butter in a limited area of the bowl...Scrape the mass together as necessary and repeat...until the butter is softened. Add the sugar gradually and work the butter and sugar together until the mixture is light in color and texture." Sounds easy enough.

I used the metal mixing bowl again to make sure that the bowl material wouldn't be a factor. I grabbed the wooden spoon and mashed away at that margarine like there was no tomorrow. Unfortunately, I had failed to take into account the fact that the metal mixing bowl was tall and narrow, so I didn't have a very good angle from which to attack the margarine. It became some sort of awkward grapple with the bowl and spoon that at one point resulted in using my left hand, although I'm a righty. After mashing the margarine around a bit, I dumped all the sugar in at once and kept mashing. Yes, I know that the instructions from Joy Of Cooking says to add it gradually, but I added the sugar all at once with the electric mixer so I did it here too. Finally, after what seemed like an eternity of mashing, sliding, and scraping I ended up with this:

Doesn't look too bad, right? In fact, here's a comparison picture between the two creamings:

Left: Electric mixer. Right: Wooden spoon.

The two look pretty similar, though the electric mixer method spread the margarine all around the bowl, while using the spoon kept it in one place. In fact, I thought that the wooden spoon version was lighter and fluffier. Again, as before, I mixed the vanilla and egg together then mixed it with the margarine/sugar using the spoon. Finally, I added the flour/baking soda/salt mixture and the chocolate chips and mixed it all together with the spoon. It did become apparent that the dough was somewhat stiff and not so easy to stir with a spoon, but I was dedicated to the method.

Once the dough was done, I made the cookies exactly the same way I did the first time: Nine cookies on the first sheet, eight cookies the second time, cooling the sheet down in between batches. These are the finished cookies:

First batch on the left, second on the right

And just for a visual comparison, here are the two different trays of cookies. As you can see, there's nothing visually that stands out as different between these two cookie versions.

Top: Electric mixer cookies. Bottom: Wooden spoon cookies.

Now that the baking was over, it was time for the taste testing. I got a hold of a bunch of friends and asked them to try out some cookies for me. I labeled the cookies "M" (for mixer) and "S" (for spoon), gave them one of each, and asked for some freeform comments.

Most of the comments on the M cookies were positive. Many noted that their cookie was "not too sweet" and was "light" or "airy." A few described it as "smooth." Two tasters noted that the margarine came through really strong, leaving a noticeable fat flavor in their mouths. On the other hand, the S cookies were not as well received. One taster described the texture as "mealy." A few tasters described different dominant flavors: ranging from vanilla to salt to just plain cookie dough. Also, the S cookies were described as denser than the M cookies. In the end, four of the tasters preferred the M cookies, two preferred the S cookies, and one really didn't care.

The flavor imbalance of the S cookies was not that surprising. Remember, creaming helps the remaining ingredients combine evenly throughout the dough because of the pockets in the fat. Without adequate creaming, ingredients will be concentrated in some cookies while nearly absent in others made from the same dough. Also, S cookies would be denser than their M counterparts because less air was beaten into the fat and sugar.

That's just the freeform comments. What about hard numbers? I asked everyone to rate the cookies on flavor and texture from one to five, where one was the worst and five was the best. The results? M cookies had an average taste score of 3.21 compared to S's average of 3.07. M cookies had an average texture score of 3.43 compared to S's average of 3.07. Clearly, the M cookies were the victors in this battle.

But just how significant was that victory? While everyone had a preferred cookie, no one thought that the other cookie was so bad they wouldn't eat it again. In fact, the remaining cookies went pretty quickly; I only had a few left by the end of the day. I think the takeaway is that an electric mixer makes much better cookies than using a wooden spoon, but the spoon can certainly make a serviceable cookie.

That being said, I think I'm going to end up springing for an electric mixer. Because I hold to the philosophy that if you're going to make something, you should make it the best way you can. And it's clear to me that the best way to make a cookie is with an electric mixer.

[Got any other experiments you'd be interested in reading about? I've got a few more lined up in the future, including: oil vs. melted butter, how to replace egg whites in recipes, and gluten free substitutes. But if you've got ideas, leave a comment below or send me an e-mail at abonetopick@gmail.com]

Wednesday, April 27, 2011

Passover (Gluten-Free!) Lime Pie


[Up-front note: The photos in this post were taken by my sister, Elisheva Ackerson, using my very old and pathetic camera (unless she's in them. Then it's all me). Lucky for me, she's a professional photographer, so she knew how to make my camera produce good pictures. You should see what she does with a high-quality camera. If you're in the Baltimore metro area this summer and want a photographer, get in touch with me and I'll pass on your contact info.]

Recently, I spent the Jewish holiday of Passover with my family in my hometown of Baltimore. It's always an interesting experience to cook or bake in my parents' home. My mother was diagnosed with celiac about four years ago, so the family has to make an effort to keep food gluten-free whenever possible. For Passover, the practical upshot is that we don't use matzah meal in anything. For example, my mom's gluten-free Passover blondies rely on ground up walnuts as a binder - and are very, very good. I even expected to make a batch of those blondies over the holiday and use it as a blog post. But then, something great happened.

Just before the holiday, I came across a recipe on the Washington Post's website for a Passover Key lime pie that didn't use any matzah meal. I was ecstatic. The recipe looked straightforward, and aside from the limes, all the ingredients were ones I knew would be around the house. I forwarded it to my mother and sister with a message along the lines of "We are totally doing this!" My sister was just as excited. My mother...less so. She didn't have a problem with the recipe, but was less than convinced that I would have the time to do it. I also had to make sure it didn't interfere with the rest of the holiday cooking. "No problem," I said. "I'll make it on Sunday before the last days [of Passover]. There should be plenty of time." With a plan in place, and with my sister as a willing accomplice/sous-chef, I was looking forward to this pie.

Sunday morning, I wasn't feeling so great. A Passover diet can do that to you, and I had been on it for five days. Nevertheless, I resolved to get this pie done. My mother pointed out to me that Key limes were a seasonal fruit and it was unlikely that the local stores had any. She suggested I call up Trader Joe's first as it was the most likely candidate to have them in stock. One phone call later, and I was off...to Shoppers to pick up regular limes as a substitute. No big deal. I returned home, woke up my sister, and started to get everything ready.

I ran into an equipment problem early on. My original plan was to make this pareve (a kosher term referring to food that is neither meat or dairy) and use pareve equipment. The recipe called for a double boiler setup for a custard (more on that later), but there was no pareve bowl to go with a pot in the house. After conferring with my mother, I went with dairy equipment. My sister came downstairs to the kitchen and I asked her to start making the crust while I started separating eggs. My sister melted the pareve margarine in a bowl and measured out the ground walnuts from a bag that we had in the freezer. I suspended my egg-breaking to put the brown sugar into the bowl while she mixed everything together then dumped it into an 8-inch square pan. We didn't have a pie pan available, so this was the next best thing. She pressed the crust down and along the sides then put it into the oven to blind-bake the crust. Meanwhile, I finished my egg separating and whisked in the sugar to combine.

The next step was handling the limes. The recipe needs 1 tablespoon of lime zest and 1/2 cup of lime juice. We didn't have a grater available, so my sister grabbed a peeler and peeled off chunks of lime peel. Then, she took a small cutting board and a knife and started to cut the peel into smaller pieces.


I started juicing limes into a separate bowl. Since we didn't have a juicer either, I juiced it by hand through my fingers, hoping to catch any pits. I rolled the limes on the table before I began to juice them in an attempt to release some more liquid, but that didn't help much. My mother suggested microwaving the limes first, and that helped a bit but not significantly. During the juicing, the timer for the crust went off, so I checked on it. The recipe says the crust should be "firm and set," so I poked it a bit with my finger. It didn't quite seem firm enough to me, so I called my mother over to have her take a look at it. She agreed with me, so I put it back in the oven and went back to juicing. Three minutes later, I pulled the crust out, poked it enough times to get a good feel for it, then put the pan on a cooling rack.

As I squeezed the limes, I kept pouring the juice from the bowl into a measuring cup and back again to see how many more limes I needed. On one such transfer, a lot of juice sloshed out, so I had to do an extra lime. Thankfully, it didn't take that much more time, and soon the zest and the juice were ready for action.

Here's where things started to get fun. The filling for the pie is essentially a stovetop custard. To make it, I had to set up a double boiler using a Pyrex bowl sitting on top of a small pot of "barely bubbling" water. In the past, I never had much success with a double boiler. Once, I used a double boiler to melt chocolate, but my candy thermometer fell into the bowl and became so covered with chocolate that it broke. The only thing that was keeping me in a better frame of mind this time was knowing I had family around to help out.

My sister set up the pot of water on medium heat, and I stood around watching it anxiously. You know the expression "a watched pot never boils?" It's true. The water took forever to reach a stage that I thought met the "barely bubbling" criteria. I put the Pyrex bowl containing the egg and sugar mixture on top of the pot and poured in the lime juice and zest.

Finally, I gave everything a good stir and prepared for an anxiety-filled 25 minutes. This was my first time making a stovetop custard, so I was nervous that it wouldn't work out. The recipe says to stir the custard from time to time but to be careful of overstirring. The end result is supposed to be a thick custard, but I only had a vague idea of what that meant. In my mind, a thick custard is similar to a pudding, but I suspected that would be too far for this recipe since it still had to cook in the oven. Six minutes into the cooking, my mother noted that it sounded like the water was boiling. I lifted the bowl out of the pot, and sure enough, the water was at a rapid boil. I dropped the temperature down to low and placed the bowl back on the pot.

Halfway through the cooking time, I gave the custard another stir. I futzed around with the bowl, tried to determine the current consistency of the custard, and generally fretted. I remarked to my mother, "You know what the problem is? I'm not a patient person." Needless to say, she agreed with me. I talked with her about my concern with this recipe and how worried I was that it would end badly. She told me a story about a lemon-meringue pie she made that ended badly (ants were involved). In general, I can accept a recipe that ends in failure. It's happened to me before, and I'm sure it will happen to me again. But the first time I make something, I want to come close to achieving the goal. With a custard, I know it's a fine line between a good custard and overcooked eggs. Furthermore, in making this pie, I was using up all the pareve margarine we had in the house and there was no plan to get more. If it failed, I wouldn't be able to make a second attempt.

Eventually, the 25 minutes elapsed and I gave the custard another check. I put the spatula in the bowl and let the custard run off to see how thick it had become. It wasn't quite there, so I gave it another five minutes. During that time, I cut margarine into pieces to be stirred into the custard when it came off the heat. When I checked the custard again, there were gelatinous pieces stuck to the edge of the spatula, but overall it was still rather thin. When I ran my finger across the middle of the spatula, custard ran down the line in a couple of places. I chose to play it safe and yanked the bowl off the pot. I put in the pieces of margarine and whisked until smooth.

Then, I poured the custard into the pan with the crust, making sure to reserve some. One of the guests coming over for dinner that night was allergic to walnuts, so I planned to cook some custard separately for her.

As I was pouring, my sister was trying to get pictures of me. This was fine until I saw that the custard was seeping through a crack in the crust near the top, so I got a bit frustrated with the picture taking. In the end, the pie (and I) looked like this just before it went into the oven.

I placed it in the oven and set the timer for 20 minutes. Meanwhile, I poured the extra custard into six cupcake liners, each containing about 1/3 cup of custard. I put it in the oven for about eight minutes until the outer edges were set and the middle was still a bit soft. A little while later, I removed the pie from the oven. I think I let it cook too long because the middle was firm instead of "jiggly" as the recipe described. A few hours later, after the pie and the cups cooled, I covered them with foil and stuck them in the fridge until dinner. The recipe calls for a meringue topping for the pie, but I chose not to make it. Frankly, I didn't want to deal with it. I had other (non-food) things to take care of and not a lot of time to do it, so I skipped it.

When I served the pie at dinner, everyone liked it. My friend who couldn't eat nuts was very appreciative of the separate cups. Personally, I was surprised that the custard came out as well as it did. It was more spongy than smooth and creamy, but it still tasted really good. The lime came through clearly but not too strong. I thought the nut crust was a little too...walnut-y. I don't know what it was, but the nut flavor was just a bit off. Maybe using fine-ground walnuts was part of the problem. I'm not sure what I would do to correct it; maybe use a different nut or try grinding up whole walnuts. But overall, I would call it a success.

I'll leave the final verdict with my father. He said this as he was licking his spoon. "Hm...OK, I think we'll let you make it again." Thanks.

Finally, here are some additional photos my sister took. I'd be remiss if I didn't include them.


Below is the recipe without the meringue topping, since I didn't make it. Follow the link to find directions on how to make it.
-----------------------------------------------------------------
Passover Key Lime Pie (Adapted from The Washington Post's recipe adaptation from Paula Shoyer's "The Kosher Baker: Over 160 Dairy-Free Recipes From Traditional to Trendy")

Crust

4 tablespoons (1/2 stick) pareve margarine (contains neither meat nor dairy products)
3 1/2 to 4 cups walnuts, ground to yield 2 cups
3 tablespoons light brown sugar

Filling

5 large eggs, plus 3 large egg yolks
1 1/2 cups sugar
1/2 cup of lime juice and 1 tablespoon of lime zest (the original recipe calls for 14 Key limes or 4-5 regular limes. I ended up needing 6 limes for the juice.)
8 tablespoons (1 stick) pareve margarine, cut into small pieces
1 drop natural green food coloring (optional, I left it out)

1) Preheat the oven to 350 degrees. Place an 8-inch deep-dish pie plate or 9-inch pie plate on a baking sheet.

2) Place the margarine in a medium microwave-safe bowl and heat on HIGH for 45 seconds or until melted. Stir in the walnuts and brown sugar; mix until combined.

3) Transfer to the pie plate and press to cover the bottom and about 1 inch up the sides. Bake for 15 minutes so the crust is firm and set.

4) Transfer to a wire rack to cool; leave the oven on.

5) Combine the eggs, yolks and sugar in a heatproof bowl

6) Set the bowl over a medium saucepan filled with a few inches of barely bubbling water, over medium heat. Stir to combine the egg mixture, then pour in the lime zest and lime juice and stir to combine.

7) Cook uncovered for about 25 minutes, stirring occasionally, to form a thick custard. Be patient and do not stir too much.

8) Remove from the heat. Whisk in the margarine in small pieces until the cream is smooth. Stir in the green food coloring, if using.

9) Pour the filling into the prepared crust, spreading it evenly. Bake (with the pie plate on the baking sheet) for 20 minutes (at 350 degrees) or until the outside edges of the filling are set; the inside can remain a little jiggly.

10) Let cool, then refrigerate for at least 2 hours.