Monday, May 23, 2011

The Creaming Method: Mixer vs. Spoon

If you've read some of my earlier posts, you'll know that I frequently lament my inability to use my electric mixer for dairy products. As a result of this limitation, I am unable to make any cookies that require the creaming method when mixing butter and sugar. I've managed to select recipes in the past that avoid this problem, such as the Chocolate Chip Cookies I made which uses melted butter instead.

But recently, I received two competing comments on posts about the creaming method. First, an anonymous commenter (later revealed to be my mother) wrote on my Girl Scout Thin Mints post: "I think it is time to get a mixer!" Then, another anonymous commenter (later revealed to be the mother of a friend of mine) wrote on my Molasses Spice Cookies post: "Wooden Spoon! One of the best implements used by bakers for generations. With a little elbow grease, it creams butter and sugar perfectly." So I had a challenge on my hands: Could a wooden spoon cream butter and sugar as well as an electric mixer? I decided to find out.

Before I began the baking, I did some research on the creaming method. This involved reading Shirley Corriher's Cookwise and watching a couple of episodes of Good Eats. Essentially, the creaming method combines fat (usually butter) and sugar together, usually at a quick speed. This has a few effects: First, it adds air to the butter/sugar mixture, resulting in a lighter final product. Second, the impact of the sugar slamming into the butter creates small pockets, which expand during baking, contributing an airy texture to the product as well. Finally, those same pockets allow other ingredients to become more evenly incorporated throughout the dough, so there aren't random pockets of concentrated ingredients.

Conventional wisdom has told me that only an electric mixer has the power and speed to cream butter and sugar effectively. Creaming by hand means that there is insufficient velocity to make the pockets in the fat that are essential to a good cookie. Therefore, the hypothesis of my experiment was this: Cookies that use an electric mixer for creaming are better than cookies creamed by hand. Now, because I was using the electric mixer for part of this experiment, I needed to use dairy-free margarine in my recipe. I found a recipe for a chocolate chip cookie that called for 1/2 cup of margarine, which was also helpful as 1/2 cup is the same as a stick, so I wouldn't need to do extra measuring.

First was the electric mixer method. To start, I pulled out a stick of margarine from the fridge and put it on a table to soften for 30 minutes. While I waited, I turned the oven on to 350 degrees. Then, I measured out my flour and baking soda. The recipe was written volumetrically, not by weight, so I wrote down the weight of everything so I could precisely duplicate the recipe when I switched to the other method. Therefore, the 1 1/8 cup of flour I used became 159 grams and the 1/2 teaspoon of baking soda became 3 grams. I didn't measure the "pinch of salt" because it was too small to measure by weight. In lieu of a sifter, I put the dry ingredients into a bowl and stirred them up with a whisk.

Once the 30 minutes were up, I put the stick of margarine into the bowl of my mixer. I poured out 1/4 cup of white sugar (45 grams) and 1/2 cup of packed brown sugar (96 grams) and put it in the bowl with the margarine. I stuck the paddle attachment on the mixer and let it run for a few minutes until the margarine/sugar mixture looked light and fluffy.

In a plastic cup, I combined the egg and the vanilla before pouring it into the mixing bowl. A minute later, I added the flour/baking soda/salt mixture in batches until everything was combined. Finally, I measured out a cup of my favorite chocolate chips (170 grams) and stirred it in. When everything came together, I started portioning the dough, where I made a mistake. The recipe calls for "heaping teaspoons" of dough, but I read it as "heaping tablespoons." Oops. But larger cookies aren't the worst thing in the world, right? As long as I was consistent, the experiment was still valid. Besides, I was weighing every dough blob to keep the cookies about the same size amongst themselves, so everything was good.

Nine 44-47 gram balls of dough later, I had my first batch of cookies in the oven. I rotated the sheet after five minutes, then checked on them again five minutes later. The centers of the cookies looked undercooked, but the edges were defined and somewhat set, so I pulled them out of the oven anyway. Once I had the parchment paper off the baking sheet and onto the cooling rack, I ran the sheet under cold water so the next batch wouldn't start cooking from the heat of the pan (as they did in the Chocolate Chip Cookies). I portioned out the remaining eight cookies, and repeated the baking process. When they were all out of the oven, I put them on the rack to cool. I separated the first half from the second to account for the slight difference in oven temperature between the two, which I expected would come up again later. You'll notice there's only 16 cookies below in the picture when I made 17. That's because I ate one. Sue me.

On the left, the first batch. On the right, the second.

Then it was time for the wooden spoon method. I repeated the starting steps from before (leaving the margarine out for 30 minutes; "sifting" together the flour, baking soda, and salt; measuring out the two types of sugar), taking care to keep the weight of everything the same from the electric mixer method. But once I was ready to cream the margarine/sugar by hand, I wasn't sure how to go about doing it. Put it all in a bowl and stir the spoon around as fast as possible? Stab the margarine with the spoon, roll it in the sugar, and stab it again?

Thankfully, The Joy Of Cooking came to my rescue. It describes a method for creaming by hand: "Mash the butter against the side of the bowl with a wooden spoon, using a rocking and sliding motion and keeping the butter in a limited area of the bowl...Scrape the mass together as necessary and repeat...until the butter is softened. Add the sugar gradually and work the butter and sugar together until the mixture is light in color and texture." Sounds easy enough.

I used the metal mixing bowl again to make sure that the bowl material wouldn't be a factor. I grabbed the wooden spoon and mashed away at that margarine like there was no tomorrow. Unfortunately, I had failed to take into account the fact that the metal mixing bowl was tall and narrow, so I didn't have a very good angle from which to attack the margarine. It became some sort of awkward grapple with the bowl and spoon that at one point resulted in using my left hand, although I'm a righty. After mashing the margarine around a bit, I dumped all the sugar in at once and kept mashing. Yes, I know that the instructions from Joy Of Cooking says to add it gradually, but I added the sugar all at once with the electric mixer so I did it here too. Finally, after what seemed like an eternity of mashing, sliding, and scraping I ended up with this:

Doesn't look too bad, right? In fact, here's a comparison picture between the two creamings:

Left: Electric mixer. Right: Wooden spoon.

The two look pretty similar, though the electric mixer method spread the margarine all around the bowl, while using the spoon kept it in one place. In fact, I thought that the wooden spoon version was lighter and fluffier. Again, as before, I mixed the vanilla and egg together then mixed it with the margarine/sugar using the spoon. Finally, I added the flour/baking soda/salt mixture and the chocolate chips and mixed it all together with the spoon. It did become apparent that the dough was somewhat stiff and not so easy to stir with a spoon, but I was dedicated to the method.

Once the dough was done, I made the cookies exactly the same way I did the first time: Nine cookies on the first sheet, eight cookies the second time, cooling the sheet down in between batches. These are the finished cookies:

First batch on the left, second on the right

And just for a visual comparison, here are the two different trays of cookies. As you can see, there's nothing visually that stands out as different between these two cookie versions.

Top: Electric mixer cookies. Bottom: Wooden spoon cookies.

Now that the baking was over, it was time for the taste testing. I got a hold of a bunch of friends and asked them to try out some cookies for me. I labeled the cookies "M" (for mixer) and "S" (for spoon), gave them one of each, and asked for some freeform comments.

Most of the comments on the M cookies were positive. Many noted that their cookie was "not too sweet" and was "light" or "airy." A few described it as "smooth." Two tasters noted that the margarine came through really strong, leaving a noticeable fat flavor in their mouths. On the other hand, the S cookies were not as well received. One taster described the texture as "mealy." A few tasters described different dominant flavors: ranging from vanilla to salt to just plain cookie dough. Also, the S cookies were described as denser than the M cookies. In the end, four of the tasters preferred the M cookies, two preferred the S cookies, and one really didn't care.

The flavor imbalance of the S cookies was not that surprising. Remember, creaming helps the remaining ingredients combine evenly throughout the dough because of the pockets in the fat. Without adequate creaming, ingredients will be concentrated in some cookies while nearly absent in others made from the same dough. Also, S cookies would be denser than their M counterparts because less air was beaten into the fat and sugar.

That's just the freeform comments. What about hard numbers? I asked everyone to rate the cookies on flavor and texture from one to five, where one was the worst and five was the best. The results? M cookies had an average taste score of 3.21 compared to S's average of 3.07. M cookies had an average texture score of 3.43 compared to S's average of 3.07. Clearly, the M cookies were the victors in this battle.

But just how significant was that victory? While everyone had a preferred cookie, no one thought that the other cookie was so bad they wouldn't eat it again. In fact, the remaining cookies went pretty quickly; I only had a few left by the end of the day. I think the takeaway is that an electric mixer makes much better cookies than using a wooden spoon, but the spoon can certainly make a serviceable cookie.

That being said, I think I'm going to end up springing for an electric mixer. Because I hold to the philosophy that if you're going to make something, you should make it the best way you can. And it's clear to me that the best way to make a cookie is with an electric mixer.

[Got any other experiments you'd be interested in reading about? I've got a few more lined up in the future, including: oil vs. melted butter, how to replace egg whites in recipes, and gluten free substitutes. But if you've got ideas, leave a comment below or send me an e-mail at abonetopick@gmail.com]

Monday, May 16, 2011

Chocolate Pasta: Take 1

Here's the problem with making chocolate pasta. It looks disgusting. Squid ink pasta, which I've seen on TV, is a really cool looking black pasta. That's what I thought chocolate pasta could look like. Unfortunately, chocolate is more brown than black, so almost every picture I'm going to put in this post will probably look...well, gross. But I promise it tasted good.

Why chocolate pasta? Last week, I completed my second-to-last semester of my Master's program. To kick off my temporary freedom, I thought I'd try my hand at chocolate pasta, a recipe that looked really awesome and totally bizarre. I can't remember when or how I came across the recipe, but once I read it, I knew it had to be done. The only question was a matter of time. Making the pasta isn't a labor intensive process, but when the heck was I going to eat an entire plate of chocolate pasta? Thankfully, a bunch of friends were coming to over to my place on Sunday for dinner, so it was the perfect time to try it out and get some feedback.

My friends planned to arrive around 7:15, so I began the process around 5:30 to allow time for rolling and cutting. The recipe uses a food processor to mix everything together, but mine only has a 2-cup capacity, and I was concerned about the processor overflowing. I decided to make the pasta in two batches, doing half the recipe in the processor at a time. I began by putting the flour, egg, cocoa, and powdered sugar into the processor. Then, I measured out the 30 grams of chocolate and put it in the microwave. 30 grams of chocolate is a lot smaller than I expected it to be. I melted the chocolate most of the way, stirred it around a bit, then spooned it into the processor. I closed the lid, pushed the button, and waited for the magic.

Except...nothing happened. I kept pressing the button, but nothing in the bowl moved. I heard a whirring sound each time, which led to further confusion. Finally, I realized I had completely forgotten to put the blade in the processor. This presented a bit of a dilemma. Should I: 1) try to squish the blade through everything and hope I don't make a huge mess; or 2) dump everything out of the bowl, put the blade inside, then put the ingredients back in. If you've read any of my posts to date, you can probably guess I went with option 1.

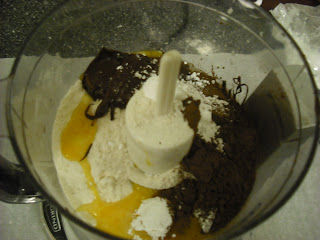
While the now-functional food processor did splash some egg around the inside of the lid, after a few seconds, the inside of the bowl went from this:


To this:


Hey, I warned you it would look gross.

Next, I had to knead the dough for 10 minutes until smooth. Here's where my lack of thorough melting came back to haunt me. As I was pressing down on the dough, I felt bumps that were scratching my hands a bit. I picked out one of the bumps and discovered it was a piece of a chocolate chip that hadn't melted. I removed as many of those pieces as I could from the dough as I was nervous that whole pieces of chocolate chips in boiling water might cause the pasta to seize or something. Yeah, so it's not the most rational worry, but it still couldn't be a good thing.

After kneading for some time, my dough looked much smoother, though no less disgusting.

I wrapped it up in plastic wrap and put it in the fridge while I made the second batch of the dough. The recipe doesn't require any resting, but since it was going to be a while until I rolled out the dough and cut it, I figured sticking it in the fridge couldn't hurt. In retrospect, leaving it on the counter would probably have been better, but I don't think it really made a difference in the end.

I cleaned out the food processor and started to combine the ingredients again, this time making sure that the blade was in place before I started pouring things into the bowl. Also, this time around, I made sure to add a few extra grams of chocolate before melting it to account for the bit that stuck to the microwaveable bowl and I couldn't scrape off. This time, when I ran the food processor, the end result was much smoother and easier to work with, and even seemed a bit shinier. I kneaded it as before, this time without any annoying chocolate chip pieces. I wrapped it up, then went to kill some time for a while before rolling out the pasta.

Now, here's where some insanity kicks in. I don't have a pasta roller, but I do have a rolling pin. I thought to myself, "Hey, I could roll this out by hand, right? It's just like rolling out cookie dough, but thinner." So I tore off a piece of parchment paper, floured it lightly, then dumped the first batch of dough onto the paper. I rolled it out a bit, then folded it over onto itself, then repeated the process a few times. Then I started rolling out the dough in earnest, but the parchment paper kept bunching up. Then, the dough kept sticking to my rolling pin. Finally, I had the bright idea to roll out the dough between two pieces of wax paper, which worked reasonably well. I put all of my weight onto the rolling pin as I rolled, trying to get the pasta to a thickness similar to fettucini. There was a lot of straining and grunting as I tried to press the dough down. At one point, it started to feel a lot like a strenuous workout, which sounds really lame, but hey: don't judge me. Much.

Eventually, I ended up with a lengthy sheet of dough that was about as thin as I was going to get. I'd put a picture here, but it looks like all my images are blurry, so you'll have to imagine it. It's just like rolled out chocolate cookie dough. I set a pot of water to boil while I began cutting the dough. I pulled out a knife and cut strips of the dough on the wax paper, peeled them off, and put them on a nearby piece of parchment paper. As I peeled the strips of pasta away, they left behind some pieces of dough, an unfortunate side effect of the wax paper. Halfway through, I gave up on the wax paper, and peeled the whole thing off to finish the cutting on the parchment paper. This way, I would have an easier time peeling the individual pieces. When all the cutting was done, here's what the pasta looked like:


Once the water started to boil, I dropped in the pasta and set the timer for three minutes. The water quickly turned a disturbing shade of brown, but that's what you get when you dump cocoa in water. The timer went off, I removed the pasta with a spoon, and put it into a colander to drain. I then went about repeating the entire process with the second batch of dough, this time transferring the rolled out dough to the parchment paper before cutting it, so I could get all the "sticking to the surface" mess out of the way at the start. 10 minutes later, I had a complete batch of chocolate pasta, which I lightly dusted with some powdered sugar.


I served the plate of pasta to friends of mine and asked for some feedback. The general consensus was that the chocolate flavor was subtle, and that it tasted more like pasta with some chocolate in there somewhere vs. intensely flavored chocolate. I tried some myself, and I was forced to agree. I had envisioned chocolate pasta as this really rich chocolate dessert dish that also functioned as pasta. The way it stands right now, it doesn't really function that way. I'm not sure it functions as a main course either, since the chocolate flavor is strong enough that I think it would clash with some of the more traditional pasta sauces.

I asked my friends for some ideas on how to make the chocolate flavor more pronounced or how to make the dish as a whole be better. One suggested adding salt to the water (nowhere during this entire process did I use any salt). Another suggested putting some coffee in there somewhere, either in the original dough or the water. One popular idea was adding a raspberry sauce, hoping the tartness of the raspberries would both accentuate the subtle sweetness in the pasta and overall blend well. I liked that idea the most and will probably try it the next time I make this pasta. I'm also open to other ideas; leave them in the comments below.

Overall, what was my takeaway? Mainly, eating this chocolate pasta as a standalone isn't so great. It needs something really pull it together. But at the end of the day, I was satisfied with what I produced. I just hope the next time it'll be even better.

Oh, and rolling out pasta by hand? It can be painful. But totally worth it.
-----------------------------------------------------------------------------
Chocolate Pasta (adapted from a recipe on "Instructables" which can be found here: Chocolate Pasta)

Remember that the chocolate flavor of this pasta is mild.
  • 1 cup of Plain Flour
  • 2 eggs, lightly beaten
  • 60g (2oz) Dark Chocolate
  • 2 Tbsp Cocoa
  • 1 Tbsp Icing (Powdered) sugar
1) Add all the ingredients into your food processor and process until mixture forms into a ball.

2) Turn onto a lightly floured surface and kneed for 10 minutes until smooth.

3) Split the dough in half and work with half at a time. Flatten pasta out with hands slightly and roll on widest setting in pasta machine. Fold over, and repeat, occasionally changing the rolling width. As it gets closer to the thickness you want, you can drop the folding over step. (If you don't have a pasta machine, you can roll this out with a rolling pin.)

4) Once the pasta reaches the desired width, cut the pasta into whatever shapes you want. (I made something like fettucini, but the original recipe used spaghetti. Then again, I was using a knife and the original writer had pasta cutters and a roller)

5) Bring a pot of water to a boil, then drop the pasta into the water. Cook for about three minutes, though the cooking time may vary with the thickness of your pasta. Remove the pasta from the water and drain.

6) Serve as is, or dusted with powdered sugar. You could also add a sauce to it, but I didn't make one and I don't have one to offer yet.

Sunday, May 8, 2011

Chocolate Chip Cookies? Perfect.

Chocolate. Chip. Cookies. Is there really any better dessert than a well-made chocolate chip cookie? Eating a warm, chewy cookie is the perfect way to end a meal. Chocolate chip cookies were the highlight of meals at my college dining hall. I used to work in the dining hall as a kosher supervisor (called a mashgiach) and my seat was right next to the kitchen. When they wheeled the tray of cookies past my chair, I would always snag a couple. On days I wasn't working, I knew how to wield the tongs to ensure I got a nice chewy cookie instead of the hard, crunchy ones. I didn't think I would ever find a cookie to measure up to those I got in college.

Until now.

Recently, Cook's Illustrated, the magazine brought to us from the geniuses at America's Test Kitchen, advertised on their Tumblr page that they were holding a blogging contest for people making their "Perfect Chocolate Chip Cookie" recipe. No need to ask me twice. I had never made the full version of the chocolate chip cookie recipe. I once made the version of it found in their "Light and Healthy" cookbook, and those cookies were very well received. So I thought to myself: "If cookies made with less chocolate and butter tasted good, shouldn't cookies made with a lot more butter and chocolate taste even better?" Because if Paula Deen has taught us anything about baking and cooking, it's that everything tastes better with butter.

The only problem was when to make the cookies. I had originally planned for May 1, but other plans got in the way. I resolved to make them on Sunday, May 8. Then I found out that I only had one week left to complete all my academic work, including a major paper that was due by May 13. This meant I had to spend most of my Sunday writing this paper. How would I have time to make cookies? Well, it didn't matter. One way or another, I was going to make these cookies. Not just because of this contest, but because I wanted something to reward myself with after writing straight for 6 hours. And let me tell you, getting me to write for 6 hours is a miracle deserving of a reward. And so it was at 4:00 in the afternoon, after a lot of writing, I set out to make my cookies.

One thing I've started to do lately is set everything up before I start baking. This is to avoid the mad rush around my kitchen as I try to get everything into the mixing bowl at the right time while simultaneously avoiding burning whatever is on my stovetop. So this time, I started by pulling out all the bowls I knew I would need and putting them on the counter and set the oven to 375 degrees. I measured out my flour (by weight) and baking soda and whisked them together. Remembering the lessons of my carrot cake, I paid very close attention to how much baking soda I put in. I set that bowl aside, and pulled out two plastic containers. Into one, I put the white sugar. Into the other, the brown sugar. The recipe calls for dark brown sugar, but I only had light brown sugar available. I contemplated using my molasses to make dark brown sugar from scratch (so to speak) but I didn't want to run the risk of upsetting the delicate balance of ingredients. I thought about portioning out the vanilla, salt, and egg ahead of time as well, but decided those could wait.

My mise-en-place. Flour, sugar, brown sugar.

From there, I moved on to what is probably the most difficult part of this whole recipe: browning the butter. According to Cook's Illustrated, browning the butter is what gives the cookie its distinctive flavor, so messing up here would really make things go bad. Before I started, I made sure I had a lot of extra butter around in case I needed to start over.

The recipe's instructions suggest using a skillet to brown the butter, but I don't have a skillet that can be used for dairy products. Knowing this, I asked a question on America's Test Kitchen's Vyou channel whether I should use my non-stick pan (which is dark) or a 2-quart pot (which isn't dark, but is rather deep) to brown butter. Their response, which I anticipated, was to use the pot since the most important thing is to keep an eye on the color, something that can't be done easily with a dark pan.

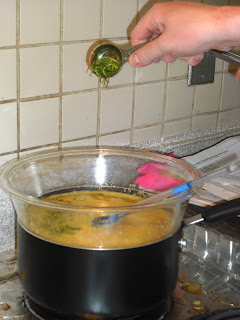
I threw the butter into the pot and set the burner on medium. It's a little tricky to take pictures of butter melting and browning while making sure the butter doesn't burn, but I think I managed. After the foaming and the bubbling started to subside a bit, I kept a very wary eye on my butter. In the past, I've burnt the butter rather than brown it, so I chose to err on the side of caution. Once I started seeing flecks of brown appear in the pot, I yanked it off the heat and poured the butter into the bowl. I immediately dropped in the remaining butter and stirred until it had all melted. I took a quick look into the pot I had used and saw that some of the butter had indeed burnt on the bottom of the pot. I crossed my fingers and hoped that I wasn't about to make burnt-butter cookies.

My butter progression from stick to browned and melted

With the daunting task of the butter out of the way, it was time to turn my attention to the mixing of the butter, sugar, salt, and vanilla. I poured in my sugars from the plastic containers, then threw in the vanilla and salt and gave it a good whisk. Once everything was incorporated, I added the egg and the extra yolk and began the four-part mixing process: 30 seconds of stirring followed by three minutes of sitting, repeated for a total of four times. I'm still not sure if I was supposed to wait three minutes after the fourth whisking, but there's really no harm in doing it, right? I mean, aside from whatever wrist strain I may incur by using a pathetically small whisk to combine everything, but that's par for the course these days.

First whisking

Second whisking

Third whisking

Final whisking

I was encouraged to see that the mixture was becoming shinier and thicker as I whisked, just as the recipe said it would. That meant I was doing something right (for once)! I stirred the flour/baking soda mixture in with a wooden spoon until it was incorporated. Then came the most important part: the chocolate chips. My go-to chocolate chip is Trader Joe's semi-sweet chocolate chips. I don't just use them in baked goods, I eat them as a snack. If I want a quick fix of chocolate, I just pull out one of the many bags of chocolate chips I keep in my kitchen. I know that the chocolate chip of choice is Tollhouse (for traditionalists) or Ghirardelli (for "high class" cookies), but I figure, if I like these chips as they are, why not put them into a cookie too? I poured the chips into the mixture and stirred until they were evenly distributed.

Finally, it was time to portion out the cookies. The recipe says each cookie should be three tablespoons in size, but I didn't have a tablespoon measure on hand. I think it goes without saying that I didn't have a disher, either. Instead, I tried to eyeball the volume of each dough ball, using a spoon from the silverware drawer as a guide. As I finished placing the fifth dough ball onto the parchment paper, I realized that I was going to quickly use more than half the dough on what was supposed to be the first eight cookies (out of 16 total). I reduced the amount of dough in the remaining three cookies, then pulled out small pieces from the first five balls and threw them back into the bowl. I didn't think it would really work, but I had no real choice. Well, I could have started over, but I rarely think things through that much.

The first eight dough balls

I put the baking sheet into the oven and set the timer for six minutes. While the cookies baked, I prepared the second batch of cookies. The recipe says to use two cookie sheets, with eight cookies per sheet, and to only bake one sheet at a time. This was not a problem for me, as I only had one sheet available to begin with. I ripped off a piece of parchment paper and began to portion out the last eight cookies. The plan was as follows: Once the first batch came out the oven, I'd take the parchment paper off the baking sheet, put it (and the cookies) onto the cooling rack, then slide the paper with the last eight cookies onto the sheet. Not a bad plan, right?

The timer went off and I rotated the baking sheet in the oven. Glancing at the sheet, I saw my cookies were huge. Not just big cookies, but mega cookies bordering on the mutant. I nervously closed the oven door and set the timer for an additional five minutes, checking on the cookies after four. Once I saw the cookies were brown at the edges but still soft in the middle, I yanked the sheet from the oven and placed it on the stovetop, ready to perform the parchment paper sheet switcheroo.

Unfortunately, things did not go quite so smoothly. First, I had some trouble getting the parchment paper from the baking sheet to the cooling rack. The cookies were sliding everywhere, and I was trying to make sure they didn't break before they set up. Once I got them onto the rack, I had to figure out how to get the remaining cookies onto the baking sheet. Picking up the paper caused the balls to roll all over the place. I know now that the best thing to do would have been to take the dough balls off the second parchment paper, put the paper on the sheet, then put the balls of dough onto the paper. Instead, I tried pulling the paper over the lip of the sheet with the balls of dough on top. The cookie dough balls rolled off the paper and onto the counter, lined up in silent judgment of my stupidity. Oh, and let's not forget that the sheet is still hot from the oven, and I'm holding it with one mitt-ed hand.

Frustrated, I quickly put the sheet back on top of the stove, put down the paper while carefully avoiding burning my fingers, and hastily transfered the balls of dough from the counter to the baking sheet. As I adjusted the position of the cookies, I saw streaks of chocolate caused by the heat of the sheet melting the chips in the dough. Without a moment's thought, I frantically put the sheet in the oven and set the timer for six minutes again.

With that crisis averted, I turned my attention to the first eight cookies which had been sitting on the cooling rack for a couple of minutes. My initial prediction was correct. These cookies were massive. Like, super-mega-ultra-mutant massive. In the picture below, they're taking up more than half the cooling rack. But they certainly looked good, which was the important part.

The timer went off and I rotated the cookies in the oven, then set the timer for five minutes. I checked on them after four minutes and saw that the edges were much browner than the first batch had been at the same time. I poked a couple of cookies and decided to err on the side of caution and pulled out the baking sheet from the oven. Now, just like the first batch, I tried to move the parchment paper sheet onto the cooling rack, but I didn't have enough space on the rack. The first set of cookies weren't firm enough to be moved too much, so I tried to position the parchment paper in such a way that all the cookies would stay on the rack. No luck. No matter how I oriented the sheet, the cookies hung over the edge of the rack and threatened to break. Eventually, I put the sheet on the countertop, and once the cookies were cooler, I transferred them to the cooling rack with a spatula.

I tried the cookies three different times: once while still warm, once after they had cooled, and once the next day (remember, another important lesson from the carrot cake). The warm cookie disintegrated in my hands, but tasted amazing. The other two held their shape much better (not surprising) and tasted just as good as the first cookie, albeit less gooey. Unfortunately, I didn't taste the "butterscotch and toffee" flavors advertised in the recipe, probably because I didn't brown the butter as much as I should have. But the cookie was among the best I've ever had, with just the right amount of chewiness and avoiding the constant problem of being too sweet.

Cook's Illustrated calls these cookies the "perfect" chocolate chip cookie. I'm not sure if I would call my cookies "perfect." Very good, yes, but not perfect. There's areas of improvement, like figuring out how to brown butter without panicking that it's burning. Therefore, I readily admit that the lack of perfection lies squarely with me and not with Cook's Illustrated. Then again, maybe I'm too hard on myself. A friend of mine, to whom I regularly give samples of my baked goods, recently said that I hold myself to a much higher standard than necessary. He told me he's never been disappointed with the things I've made. And he's probably right. I don't think I will ever make anything that I can deem "perfect." There's just too many places in a recipe where I'll do something not quite right. I always feel that there's always room for improvement with things I make. It's this self-doubt that keeps me from declaring something to be "perfect."

That being said, when I ate that warm, delicious cookie, it was the most perfect moment of my day. Maybe that's the definition of perfect I should be using: not whether I did everything perfectly, but whether eating it gave me the perfect amount of satisfaction. And in this case, it did.
-----------------------------------------------------------------
"Perfect Chocolate Chip Cookies" from Cook's Illustrated. The recipe is below, but please follow the link to the recipe for excellent advice, pictures, and videos on how to do everything described in the recipe.


INGREDIENTS
  • 1 3/4 cups unbleached all-purpose flour (8 3/4 ounces)
  • 1/2 teaspoon baking soda
  • 14 tablespoons unsalted butter (1 3/4 sticks)
  • 1/2 cup granulated sugar (3 1/2 ounces)
  • 3/4 cups packed dark brown sugar (5 1/4 ounces)
  • 1 teaspoon table salt
  • 2 teaspoons vanilla extract
  • 1 large egg
  • 1 large egg yolk
  • 1 1/4 cups semisweet chocolate chips or chunks
  • 3/4 cup chopped pecans or walnuts, toasted (optional)

INSTRUCTIONS
1. Adjust oven rack to middle position and heat oven to 375 degrees. Line 2 large (18- by 12-inch) baking sheets with parchment paper. Whisk flour and baking soda together in medium bowl; set aside.

2. Heat 10 tablespoons butter in 10-inch skillet over medium-high heat until melted, about 2 minutes. Continue cooking, swirling pan constantly until butter is dark golden brown and has nutty aroma, 1 to 3 minutes. Remove skillet from heat and, using heatproof spatula, transfer browned butter to large heatproof bowl. Stir remaining 4 tablespoons butter into hot butter until completely melted.

3. Add both sugars, salt, and vanilla to bowl with butter and whisk until fully incorporated. Add egg and yolk and whisk until mixture is smooth with no sugar lumps remaining, about 30 seconds. Let mixture stand 3 minutes, then whisk for 30 seconds. Repeat process of resting and whisking 2 more times until mixture is thick, smooth, and shiny. Using rubber spatula or wooden spoon, stir in flour mixture until just combined, about 1 minute. Stir in chocolate chips and nuts (if using), giving dough final stir to ensure no flour pockets remain.

4. Divide dough into 16 portions, each about 3 tablespoons (or use #24 cookie scoop). Arrange 2 inches apart on prepared baking sheets, 8 dough balls per sheet. (Smaller baking sheets can be used, but will require 3 batches.)

5. Bake cookies 1 tray at a time until cookies are golden brown and still puffy, and edges have begun to set but centers are still soft, 10 to 14 minutes, rotating baking sheet halfway through baking. Transfer baking sheet to wire rack; cool cookies completely before serving.

Wednesday, April 27, 2011

Passover (Gluten-Free!) Lime Pie


[Up-front note: The photos in this post were taken by my sister, Elisheva Ackerson, using my very old and pathetic camera (unless she's in them. Then it's all me). Lucky for me, she's a professional photographer, so she knew how to make my camera produce good pictures. You should see what she does with a high-quality camera. If you're in the Baltimore metro area this summer and want a photographer, get in touch with me and I'll pass on your contact info.]

Recently, I spent the Jewish holiday of Passover with my family in my hometown of Baltimore. It's always an interesting experience to cook or bake in my parents' home. My mother was diagnosed with celiac about four years ago, so the family has to make an effort to keep food gluten-free whenever possible. For Passover, the practical upshot is that we don't use matzah meal in anything. For example, my mom's gluten-free Passover blondies rely on ground up walnuts as a binder - and are very, very good. I even expected to make a batch of those blondies over the holiday and use it as a blog post. But then, something great happened.

Just before the holiday, I came across a recipe on the Washington Post's website for a Passover Key lime pie that didn't use any matzah meal. I was ecstatic. The recipe looked straightforward, and aside from the limes, all the ingredients were ones I knew would be around the house. I forwarded it to my mother and sister with a message along the lines of "We are totally doing this!" My sister was just as excited. My mother...less so. She didn't have a problem with the recipe, but was less than convinced that I would have the time to do it. I also had to make sure it didn't interfere with the rest of the holiday cooking. "No problem," I said. "I'll make it on Sunday before the last days [of Passover]. There should be plenty of time." With a plan in place, and with my sister as a willing accomplice/sous-chef, I was looking forward to this pie.

Sunday morning, I wasn't feeling so great. A Passover diet can do that to you, and I had been on it for five days. Nevertheless, I resolved to get this pie done. My mother pointed out to me that Key limes were a seasonal fruit and it was unlikely that the local stores had any. She suggested I call up Trader Joe's first as it was the most likely candidate to have them in stock. One phone call later, and I was off...to Shoppers to pick up regular limes as a substitute. No big deal. I returned home, woke up my sister, and started to get everything ready.

I ran into an equipment problem early on. My original plan was to make this pareve (a kosher term referring to food that is neither meat or dairy) and use pareve equipment. The recipe called for a double boiler setup for a custard (more on that later), but there was no pareve bowl to go with a pot in the house. After conferring with my mother, I went with dairy equipment. My sister came downstairs to the kitchen and I asked her to start making the crust while I started separating eggs. My sister melted the pareve margarine in a bowl and measured out the ground walnuts from a bag that we had in the freezer. I suspended my egg-breaking to put the brown sugar into the bowl while she mixed everything together then dumped it into an 8-inch square pan. We didn't have a pie pan available, so this was the next best thing. She pressed the crust down and along the sides then put it into the oven to blind-bake the crust. Meanwhile, I finished my egg separating and whisked in the sugar to combine.

The next step was handling the limes. The recipe needs 1 tablespoon of lime zest and 1/2 cup of lime juice. We didn't have a grater available, so my sister grabbed a peeler and peeled off chunks of lime peel. Then, she took a small cutting board and a knife and started to cut the peel into smaller pieces.


I started juicing limes into a separate bowl. Since we didn't have a juicer either, I juiced it by hand through my fingers, hoping to catch any pits. I rolled the limes on the table before I began to juice them in an attempt to release some more liquid, but that didn't help much. My mother suggested microwaving the limes first, and that helped a bit but not significantly. During the juicing, the timer for the crust went off, so I checked on it. The recipe says the crust should be "firm and set," so I poked it a bit with my finger. It didn't quite seem firm enough to me, so I called my mother over to have her take a look at it. She agreed with me, so I put it back in the oven and went back to juicing. Three minutes later, I pulled the crust out, poked it enough times to get a good feel for it, then put the pan on a cooling rack.

As I squeezed the limes, I kept pouring the juice from the bowl into a measuring cup and back again to see how many more limes I needed. On one such transfer, a lot of juice sloshed out, so I had to do an extra lime. Thankfully, it didn't take that much more time, and soon the zest and the juice were ready for action.

Here's where things started to get fun. The filling for the pie is essentially a stovetop custard. To make it, I had to set up a double boiler using a Pyrex bowl sitting on top of a small pot of "barely bubbling" water. In the past, I never had much success with a double boiler. Once, I used a double boiler to melt chocolate, but my candy thermometer fell into the bowl and became so covered with chocolate that it broke. The only thing that was keeping me in a better frame of mind this time was knowing I had family around to help out.

My sister set up the pot of water on medium heat, and I stood around watching it anxiously. You know the expression "a watched pot never boils?" It's true. The water took forever to reach a stage that I thought met the "barely bubbling" criteria. I put the Pyrex bowl containing the egg and sugar mixture on top of the pot and poured in the lime juice and zest.

Finally, I gave everything a good stir and prepared for an anxiety-filled 25 minutes. This was my first time making a stovetop custard, so I was nervous that it wouldn't work out. The recipe says to stir the custard from time to time but to be careful of overstirring. The end result is supposed to be a thick custard, but I only had a vague idea of what that meant. In my mind, a thick custard is similar to a pudding, but I suspected that would be too far for this recipe since it still had to cook in the oven. Six minutes into the cooking, my mother noted that it sounded like the water was boiling. I lifted the bowl out of the pot, and sure enough, the water was at a rapid boil. I dropped the temperature down to low and placed the bowl back on the pot.

Halfway through the cooking time, I gave the custard another stir. I futzed around with the bowl, tried to determine the current consistency of the custard, and generally fretted. I remarked to my mother, "You know what the problem is? I'm not a patient person." Needless to say, she agreed with me. I talked with her about my concern with this recipe and how worried I was that it would end badly. She told me a story about a lemon-meringue pie she made that ended badly (ants were involved). In general, I can accept a recipe that ends in failure. It's happened to me before, and I'm sure it will happen to me again. But the first time I make something, I want to come close to achieving the goal. With a custard, I know it's a fine line between a good custard and overcooked eggs. Furthermore, in making this pie, I was using up all the pareve margarine we had in the house and there was no plan to get more. If it failed, I wouldn't be able to make a second attempt.

Eventually, the 25 minutes elapsed and I gave the custard another check. I put the spatula in the bowl and let the custard run off to see how thick it had become. It wasn't quite there, so I gave it another five minutes. During that time, I cut margarine into pieces to be stirred into the custard when it came off the heat. When I checked the custard again, there were gelatinous pieces stuck to the edge of the spatula, but overall it was still rather thin. When I ran my finger across the middle of the spatula, custard ran down the line in a couple of places. I chose to play it safe and yanked the bowl off the pot. I put in the pieces of margarine and whisked until smooth.

Then, I poured the custard into the pan with the crust, making sure to reserve some. One of the guests coming over for dinner that night was allergic to walnuts, so I planned to cook some custard separately for her.

As I was pouring, my sister was trying to get pictures of me. This was fine until I saw that the custard was seeping through a crack in the crust near the top, so I got a bit frustrated with the picture taking. In the end, the pie (and I) looked like this just before it went into the oven.

I placed it in the oven and set the timer for 20 minutes. Meanwhile, I poured the extra custard into six cupcake liners, each containing about 1/3 cup of custard. I put it in the oven for about eight minutes until the outer edges were set and the middle was still a bit soft. A little while later, I removed the pie from the oven. I think I let it cook too long because the middle was firm instead of "jiggly" as the recipe described. A few hours later, after the pie and the cups cooled, I covered them with foil and stuck them in the fridge until dinner. The recipe calls for a meringue topping for the pie, but I chose not to make it. Frankly, I didn't want to deal with it. I had other (non-food) things to take care of and not a lot of time to do it, so I skipped it.

When I served the pie at dinner, everyone liked it. My friend who couldn't eat nuts was very appreciative of the separate cups. Personally, I was surprised that the custard came out as well as it did. It was more spongy than smooth and creamy, but it still tasted really good. The lime came through clearly but not too strong. I thought the nut crust was a little too...walnut-y. I don't know what it was, but the nut flavor was just a bit off. Maybe using fine-ground walnuts was part of the problem. I'm not sure what I would do to correct it; maybe use a different nut or try grinding up whole walnuts. But overall, I would call it a success.

I'll leave the final verdict with my father. He said this as he was licking his spoon. "Hm...OK, I think we'll let you make it again." Thanks.

Finally, here are some additional photos my sister took. I'd be remiss if I didn't include them.


Below is the recipe without the meringue topping, since I didn't make it. Follow the link to find directions on how to make it.
-----------------------------------------------------------------
Passover Key Lime Pie (Adapted from The Washington Post's recipe adaptation from Paula Shoyer's "The Kosher Baker: Over 160 Dairy-Free Recipes From Traditional to Trendy")

Crust

4 tablespoons (1/2 stick) pareve margarine (contains neither meat nor dairy products)
3 1/2 to 4 cups walnuts, ground to yield 2 cups
3 tablespoons light brown sugar

Filling

5 large eggs, plus 3 large egg yolks
1 1/2 cups sugar
1/2 cup of lime juice and 1 tablespoon of lime zest (the original recipe calls for 14 Key limes or 4-5 regular limes. I ended up needing 6 limes for the juice.)
8 tablespoons (1 stick) pareve margarine, cut into small pieces
1 drop natural green food coloring (optional, I left it out)

1) Preheat the oven to 350 degrees. Place an 8-inch deep-dish pie plate or 9-inch pie plate on a baking sheet.

2) Place the margarine in a medium microwave-safe bowl and heat on HIGH for 45 seconds or until melted. Stir in the walnuts and brown sugar; mix until combined.

3) Transfer to the pie plate and press to cover the bottom and about 1 inch up the sides. Bake for 15 minutes so the crust is firm and set.

4) Transfer to a wire rack to cool; leave the oven on.

5) Combine the eggs, yolks and sugar in a heatproof bowl

6) Set the bowl over a medium saucepan filled with a few inches of barely bubbling water, over medium heat. Stir to combine the egg mixture, then pour in the lime zest and lime juice and stir to combine.

7) Cook uncovered for about 25 minutes, stirring occasionally, to form a thick custard. Be patient and do not stir too much.

8) Remove from the heat. Whisk in the margarine in small pieces until the cream is smooth. Stir in the green food coloring, if using.

9) Pour the filling into the prepared crust, spreading it evenly. Bake (with the pie plate on the baking sheet) for 20 minutes (at 350 degrees) or until the outside edges of the filling are set; the inside can remain a little jiggly.

10) Let cool, then refrigerate for at least 2 hours.

Wednesday, April 13, 2011

What I Learned From Carrot Cake


On Sunday, for reasons that I still don't know, I had the sudden urge to make a carrot cake from my America's Test Kitchen cookbook. I really can't explain it. I had a pound of carrots in my fridge that were originally earmarked for a stew or maybe some mirepoix. But no, they were going into a cake. Once I had the idea, I was committed. And in making the cake, I learned some things along the way, as you'll soon see.

The first step of making a carrot cake is grating the carrots. But I had one glaring problem. I didn't have a grater available. "But wait," I can hear you say, "what about a food processor?" Yeah, I don't have one of those either. So I had to figure out a way to get all my carrots (pictured below) into manageable pieces. Suddenly, it hit me. I could use a vegetable peeler! The end result wouldn't be as good, since the pieces would be larger than the "strands" produced by a grater, but it would work reasonably well. Right?

Well, there was only one way to find out. I started peeling my carrots. And peeled. And peeled. And started to get angry at my carrots. And then started to get angry with myself for stupidly trying to peel this many carrots. (As as you can see below, there were a lot of carrots.) I nearly peeled off a finger as carrots slipped from my hands. Eventually, I pulled out the cutting board and my knife and started to cut the carrots into pieces after once I couldn't peel them anymore. After what seemed like an eternity, not to mention very orange hands, I was able to get through all of the carrots.

The carrots before I cut them.
The carrots afterwards.

From there, I proceded to combine the dry goods in a bowl. I mixed my flour, baking powder, baking soda, cinnamon, nutmeg, salt, and cloves together. Here's where I made a bit of a mistake. The recipe calls for 1 teaspoon of baking soda and 1 1/4 teaspoon of baking powder. After portioning my flour, I accidentally put in 1 1/4 teaspoon of baking soda. I realized my mistake quickly, and tried to scoop out some of the baking soda with a 1/4 teaspoon measure. I don't think I was quite so successful, but I wasn't going to throw out the whole mix just because of it.

Next came the beginning of the batter. I put my eggs, brown sugar, and white sugar into my stand mixer and started it up. According to the recipe, the idea here was to whip air into the eggs to make it fluffier, which sounded fine in principle. I ran the mixer until it was creamy, then started to add oil. The intent was to make an emulsion of the oil and the egg/sugar mixture. Unfortunately, it didn't quite succeed. There was a ring of oil around the top of the batter, and no matter how long I ran the mixer, it wouldn't emulsify.

I resigned myself to my fate and started to incorporate the dry ingredients. The instructions said to do it in two batches and to whisk by hand. I started to do this, but quickly realized that the batter was getting thick and clumpy, making whisking difficult. I moved the batter back to the stand mixer, put on the whisk attachment, and kept it running. As I added the second half of the dry ingredients, the batter got drier and drier until it resembled more of a dough than a batter.

This led to an interesting time when I had to incorporate the carrots. The recipe says to "gently stir in the carrots." But the dough was so thick, there was nothing gentle about it. I had to push the carrots in forcefully with my spatula, hoping to make as even a mixture as possible. I thought adding in a little bit more oil might help loosen it, but it didn't help much. I was stuck with a clumpy, somewhat dry mixture that had carrots in there somewhere.

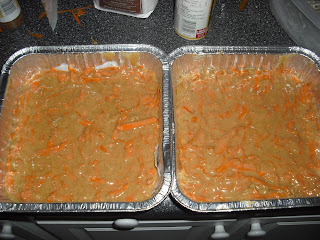
Then I had the challenge of putting the dough into pans. The recipe called for a 13 x 9 pan, which I didn't have around. I instead opted for 2 8x8 pans, attempting to divide the "batter" equally between them. This took quite a bit of effort as I had to scoop it out with my spatula instead of "pouring" it out as the recipe suggested. This resulted in the pans below.


I put them in the oven for 25 minutes, 10 minutes less than the original recipe called for. I wanted to make sure that the different pan sizes wouldn't result in an accidental overcooking. I rotated the pans a few times, reset the timer over and over, and after a total baking time of about 40 minutes, I pulled out the carrot cakes that you see at the top of this post.

I was supposed to wait two hours before removing the cakes from the pans, but I just couldn't wait. After an hour, I cut a piece of the cake and ate it. To my surprise, despite all the problems I had while making it, the cake tasted really good! The pieces of carrot were slightly larger than I would have liked, but it looked like the peeler did a reasonably good job. I ate about 1/5 of a pan of cake that night. I put the second cake into the freezer once it had cooled completely, and put the first cake into a Ziploc bag. I went to sleep that night thinking I had a success on my hands.

But this isn't the end of the story.

The next day, as I was eating my lunch, I grabbed a piece of my carrot cake to have for dessert. I bit into it, expecting to be rewarded with a sweet, carroty experience. What I got instead was an incredibly saccharine aftertaste in my mouth that I hadn't noticed the day before. Thinking it was maybe an isolated piece of the cake, I had another piece. The same aftertaste lingered in my mouth, and there was nothing I could do to get it out. My success had now fizzled into a food that left a bad taste in my mouth for hours.

I don' t know what caused the change in taste from Sunday to Monday. Maybe it had been there all along, but my desire for carrot cake on Sunday overrode it. Maybe the moisture in the Ziploc bag had caused the sugar to crystalize again. Maybe the slightly warm cake masked some of the intensity of the sugar. Or maybe it was supposed to taste that way, but without the cream cheese frosting that was supposed to accompany it, the sugariness couldn't be cut.

Whatever the reason, it taught me an important lesson, especially when applied to cooking large batches of things for myself: Before calling something a success, make sure it still tastes good the next day.

I tend to make large quantities of food because often, reducing the recipe is more hassle than it's worth. This usually results in me eating most of the food myself. I'm the only one in my apartment who can eat most of my baked goods because my roommate doesn't eat gluten. I can give friends of mine some of it, but not always. So if I'm going to have an entire cake to eat alone, it had better taste good for a couple of days after I make it. Otherwise, it's a bit of a waste.

Oh, and what did I do with the rest of the carrot cake? I ate it. Sure, it sometimes left a bad taste in my mouth, but I eventually dealt with that by over-spicing my dinner on Monday night. But that's a story for another time.

Sunday, April 3, 2011

Girl Scout Thin Mints, Take 1


There is one dessert flavor combination that ranks above all else: chocolate and mint. There's something about sharp mint flavor cutting through rich chocolate that hits just the right spot.

Chocolate minty goodness has held a special place in my heart for a long time. My favorite candy for a long time was York peppermint patties. When I went to the UK for a trip in '09, I brought back a ton of after-dinner mints because I thought they were the coolest thing ever. In college, I became renowned for my chocolate peppermint cake (a recipe I am sure will turn up on this blog in the future).

Of course, there is one product out there that strikes the perfect balance of flavor and texture. I am talking, of course, of the Girl Scout Thin Mints. They are the quintessential cookie for diehard chocolate-mint aficionados. Whenever the Scouts have their annual sale of cookies, boxes of thin mints are quickly seized by crazed fans of the delights, hoarding as many as they can until the next sale begins.

Seeking to avoid such…well, insanity, I decided to try my hand at making my own Girl Scout Thin Mints. It's a recipe that sat in my list of links for a long time, but it took a while to get my act together to actually make them. What finally did it?

Frankly, the opportunity to mock a friend of mine. One of my friends and followers on Twitter, @KatieHall, loves to talk about how many boxes of Girl Scout cookies she has in her house. Not one to let an chance to tease a friend slide, I told her that I would be making thin mints of my own to have any time I wanted. I vaguely recall describing how I'd be laughing at her as I devoured my own creations. Her response was…unimpressed to say the least. Undeterred, I started on my thin mints. Unfortunately, I made a number of mistakes in the process.

Mistakes number one and two involved creaming the butter and sugar. If you recall from my previous post, I try to avoid recipes that call for creaming because I lack a mixer I can use for dairy ingredients. But a thought occurred to me: Why not use the 2-cup capacity food processor I own? Since my recipe calls for 1/2 cup of butter and 1 cup of sugar, it should totally work, right?

No. It did not. A small food processor really doesn't want to throw sugar into butter at a high speed. What it does want to do is smoosh (yes, that is a technical term) the butter into a clump that may has a dusting of sugar on it, but leave the rest of the sugar lying on the bottom of the bowl. Not helping matters was the other mistake: the butter was way too soft. I had pulled it out of the fridge a good four hours before starting to process it. This meant that instead of a slightly softened stick, I had nearly melted mush. In an attempt to "save" the butter/sugar mix, I dumped it into a bowl and stirred it up with a whisk for a bit in an attempt to incorporate the sugar. I then mixed in the milk, vanilla extract, and (most importantly) the peppermint extract.

A word here about milk in general. I am not a big milk drinker. Some of it is because I'm lactose intolerant, so drinking milk is a bit of pain since I have to take a Lactaid caplet with it. The other part, and probably the more important one, is that I just don't like plain milk. The texture and taste are just not that appealing to me. So when I have recipes that call for milk, I try to use soy milk when possible. This helps me avoid buying large quantities of milk that eventually get thrown out when they're not used beyond the immediate recipe.

But this week, I discovered my local Trader Joe's carries shelf-stable milk (like Parmalat) in individual 8 ounce boxes. This was great because I could have some milk on hand and I wouldn't waste milk when cooking, So it was one of these cartons of milk that I ended up using for the recipe. OK, side note over.

Butter, sugar, milk, and extracts combined, I started to stir in the combined dry ingredients. Here's mistake number three: Not learning from the last cookie adventure, I continued to try using a whisk to incorporate the dry and wet ingredients. Predictably, this didn't work so well. I did eventually abandon the whisk in favor of a plastic spoon I found in the kitchen. This helped, but not before I had put a fair amount of strain on my wrist.

After some time, the dough looked really dry and crumbly. I wasn't sure if I should add more liquid, so I tried to test out the dough by attempting to pack the dough into a cohesive mass and see if it would stick. It did, so I chose to press forward anyway. This may be another mistake, but I don't know for sure, so I'm leaving it out of the count. I portioned out the dough, put half onto some plastic wrap, and tried to shape it into a log. This led to mistake number four: trying to roll it into log within the not-well-sealed plastic wrap. In my attempts to roll the dough into the appropriate shape, I managed to push the dough off the counter and onto the floor.

Sighing, I threw it into the garbage and focused on the remainder of the dough. I managed to work it into a rough approximation of a log and tossed into the freezer as directed. A few hours later, I pulled out the dough and began cut the dough into disks to be baked. Mistake number five: I used a serrated knife to do the cutting, and that dough was hard as a rock. I tried sawing at it for a while, but that didn't produce the disks I wanted. My knife kept slipping and small shavings of dough would come off. Eventually, I just pressed down on the top of the knife blade to push it through the dough. DO NOT DO THIS EVER. It is incredibly unsafe, and even if you avoid cutting your hands, it still really hurts.

The end result of all this hacking and slashing were a series of disks that ranged in thickness from 1/2 inch to 3/4 inch. In other words, I was no longer making thin mints. I was making "thin" mints.


Still, it was too late to turn back now. I tossed the disks into the oven on my brand-new baking sheet and anxiously waited to see what would happen. The recipe noted that the cookies would not spread that much, and I'm grateful that note was included. These cookies didn't spread at all, and without that note, it's quite likely I would have started to quietly freak out that I had done something wrong.

Once the cookies were done, I pulled them from the oven and let them cool on my brand-new cooling rack. Yes, I just got a new cooling rack. Yes, it's the first cooling rack I've ever owned. Yes, I should have gotten one a long time ago. Can we move on now?


As the cookies cooled, I tried one. It was a crispy wafer, and I was relieved to note that the texture was right. The chocolate and peppermint were certainly there, but they weren't very strong. I held out hope that maybe the muted flavor was because the cookie was still warm and overpowered the ability to pick up on the flavor. I really, really hoped that's what it was.

An hour later, I began the coating process by melting down some butter and Trader Joe's chocolate chips in a saucepan. Using two forks, I placed each cookie into the saucepan and coated it with chocolate. Then, I lifted the cookie out of the pan and onto a piece of parchment paper to cool. I haven't done chocolate coating often, and when I have, I tend to overcoat. This was no exception. But I like a lot of chocolate, so that wasn't so much a mistake as an….overindulgence.


Once the cookies were all coated, I put a piece of wax paper on top of them and put them in the fridge to hasten the hardening process. 30 minutes later, I was crunching into a homemade "thin" mint cookie.

The end product was certainly tasty. The mint and chocolate were both there and much more in the forefront. I was nervous that the shelf-stable milk would leave a chalky taste in the cookie, but it turned out to be a false concern. I gave some to friends of mine and they all considered it a rousing success with little to no complaints. The most common was the thickness of the cookie, which I readily copped to.

So do I consider the recipe a success? Sort of. It produced a cookie that I and many others enjoyed, so on a basic level: Yes, I was successful. But there's so much more I could do to improve the recipe. I need to find a better way to cut the cookie, for one. I want to increase the peppermint flavor, too. I debated adding some peppermint extract to the chocolate coating, but decided not to in the end. I wanted to try and make the "baseline" cookie before messing around too much with it. Now that I have the baseline, I have ideas about what to do.

Until I improve this recipe, I'm not going to post the recipe in full below. If you want to read the recipe that I used, here's a link to it: Homemade Thin Mints. And if you've got suggestions on how to overcome some of the mistakes I made, leave a comment below. I'm happy to try out new things to improve my process.